
After a whirlwind week of work, I found myself craving something satisfying yet easy to prepare. That’s when the idea of Easy Tuna Rice Balls popped into my mind. There’s a certain joy in every bite of these portable delights; they are not just a lunch option, but a tiny celebration of flavor and texture. Picture chewy sushi rice combined with savory tuna, all perfectly cradled in your hands, making for a wholesome meal you can take anywhere.
What I love most about these rice balls is their versatility. They can easily accommodate whatever ingredients you have on hand – whether you want to keep it simple with pantry staples or transform them into a vegetarian masterpiece with chickpeas or tofu. Plus, if you have leftover rice, you’re just a few steps away from a satisfying meal! Perfect for busy parents, students, and anyone looking to ditch fast food, these rice balls will quickly become a favorite. Let me show you how to whip them up!
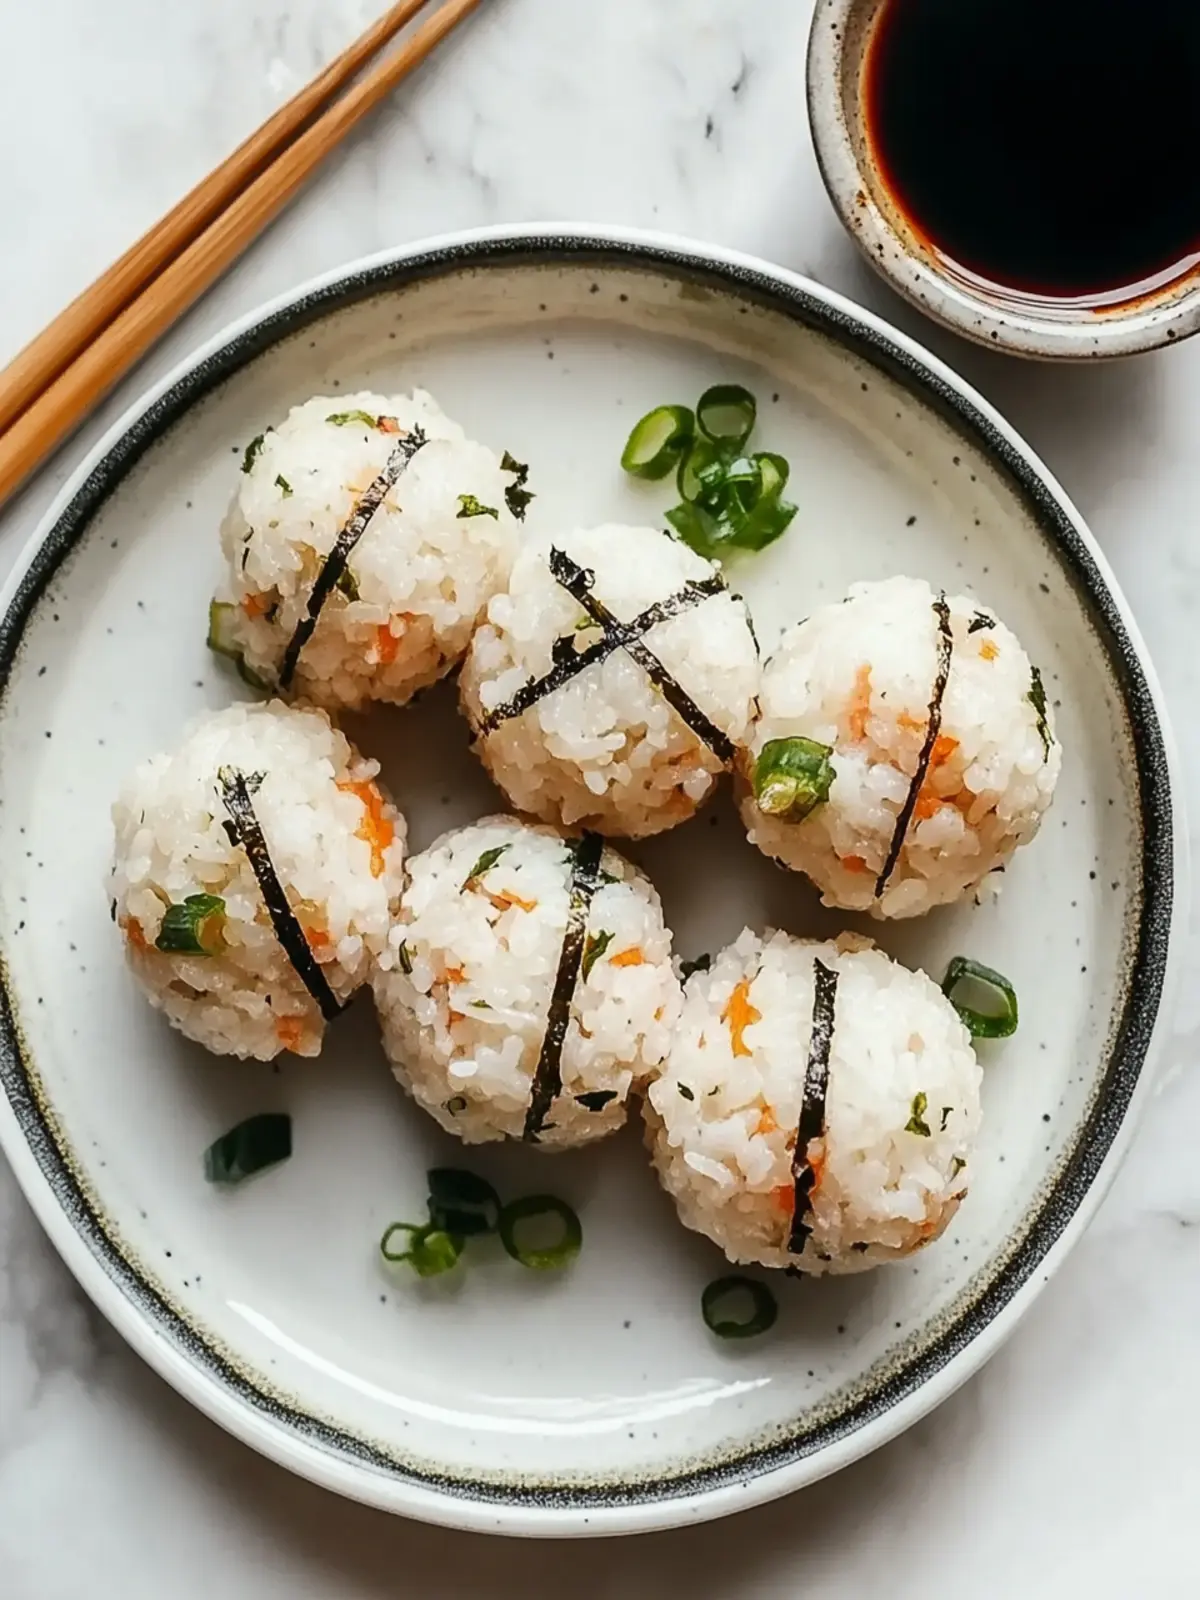
Why Love Easy Tuna Rice Balls?
Easy Tuna Rice Balls are the ideal solution for those busy days when you’re short on time but craving something delicious. Versatile Options: You can easily swap tuna for chickpeas or tofu, making these rice balls perfect for everyone. Flavor Packed: Each bite is a delightful blend of umami and creaminess, reminiscent of sushi. Budget-Friendly: Utilizing leftover rice helps save money while transforming it into a satisfying meal. Portable Goodness: Perfectly sized for on-the-go, they are an excellent choice for lunches or snacks. Quick Prep: With just a few simple steps, you’ll have a delectable dish ready to enjoy or share!
Easy Tuna Rice Balls Ingredients
• Dive into the flavors with this delightful recipe!
For the Rice Base
- Prepared Sushi Rice – This is your main ingredient providing structure; you can use brown rice or quinoa for a healthier twist.
For the Filling
- Canned Tuna – A protein-packed option that’s full of flavor; swap it for mashed chickpeas or crumbled firm tofu for a vegetarian alternative.
- Japanese Mayonnaise – Adds a creamy tang; if you’re going vegan, mix regular mayo with rice vinegar and sugar or use plant-based mayo.
For Flavor Enhancement
- Sesame Oil – This oil deepens the overall flavor profile; no direct substitutions recommended, as it adds a unique taste.
- Nori (Seaweed) – While this ingredient offers a hint of umami, it’s optional for those who want to keep it simple.
Get ready to make these Easy Tuna Rice Balls your new go-to for delicious, nutritious meals that fit perfectly into your busy lifestyle!
How to Make Easy Tuna Rice Balls
-
Combine Ingredients: In a large bowl, mix together the prepared sushi rice, sesame oil, Japanese mayonnaise, canned tuna (or your choice of substitute), and chopped nori. This will create a flavorful and cohesive mixture.
-
Mix Thoroughly: Stir the ingredients gently but thoroughly, ensuring everything is well combined. Adjust the amount of mayonnaise to achieve your preferred creaminess—smooth but not too runny.
-
Shape the Mixture: Press the mixture down into an even layer in the bowl, then use a spatula to slice it into 8 triangular portions. This will help in shaping the rice balls more easily.
-
Roll into Balls: Take each portion and roll it into a tightly packed ball using your clean hands or gloves. Make sure they’re secure so they hold their shape!
-
Serve and Enjoy: Enjoy your rice balls immediately for the best texture. They can also be packed into containers for on-the-go meals, making them ideal for lunch or snacks.
Optional: Serve with soy sauce for dipping or alongside a fresh salad for a complete meal.
Exact quantities are listed in the recipe card below.

Make Ahead Options
These Easy Tuna Rice Balls are fantastic for meal prep, saving you valuable time during busy weekdays! You can prepare the rice mixture and shape it into balls up to 24 hours in advance. Just refrigerate them in an airtight container to maintain freshness. To keep the texture just right, ensure the rice is fully cooled before shaping. When you’re ready to serve, simply take them out, and if desired, give them a quick roll in sesame seeds for added flavor. This way, you’ll enjoy delightful, homemade rice balls that taste just as delicious even after a night in the fridge!
Expert Tips for Easy Tuna Rice Balls
-
Perfect Consistency: Adjust the mayonnaise based on the moisture of your rice to avoid overly wet or dry rice balls.
-
Cool the Rice: Always let the rice cool completely before shaping, as warm rice can become too sticky and not hold shape.
-
Quick Serve: Serve immediately after rolling for the best texture; they can lose their rigidity if stored too long.
-
Chickpea Swap: If using chickpeas, make sure to mash them well and season them with soy sauce and nori flakes to enhance flavor in your Easy Tuna Rice Balls.
-
Experiment with Grains: Try using brown rice or quinoa for a healthier alternative while keeping the same delicious essence.
Easy Tuna Rice Balls Variations
Feel free to put your own spin on these delightful rice balls with these creative ideas!
-
Vegetarian Option: Swap canned tuna for mashed chickpeas mixed with soy sauce and nori flakes for a flavorful twist. You’ll still enjoy that delightful umami flavor, and it’s perfect for plant-based eaters!
-
Vegan Alternative: Use crumbled firm tofu instead of tuna, seasoned similarly with soy sauce. This keeps the protein but eliminates animal products, making it a guilt-free pleasure.
-
Whole Grain Twist: Substitute sushi rice with brown rice or quinoa for a nuttier flavor and added nutrients. Not only is this healthier, but it also enhances the texture with an earthy taste!
-
Spicy Kick: Add Sriracha or diced jalapeños to your rice mixture for an exciting pop of heat. You’ll take your lunch from ordinary to extraordinary in just a few bites!
-
Herbed Delight: Incorporate fresh herbs like cilantro or green onions into the mix for a burst of freshness. These herbs introduce a lively touch that elevates your rice balls beautifully.
-
Flavor Infusion: Drizzle in flavored oils like chili or garlic oil for an unexpected but delightful twist. With just a dash, you turn these simple rice balls into gourmet bites.
-
Nori Upgrade: Layer the rice balls with larger sheets of nori, creating a sushi-style roll before shaping them. This adds texture and a visual appeal that’s perfect for impressing guests!
-
Crunch Factor: Mix in toasted sesame seeds or crushed peanuts for an extra crunch. This contrast in texture not only satisfies the palate but also makes each bite more engaging.
What to Serve with Easy Tuna Rice Balls?
A delightful meal is just a few pairings away, bringing harmony and flavor to your lunch experience.
- Soy Sauce: A classic dipping companion that enhances the umami flavor of the rice balls, adding a salty kick.
- Fresh Garden Salad: Crisp greens and colorful veggies add freshness, balancing the savory richness of the rice balls.
- Pickled Ginger: This zesty condiment cleanses the palate between bites, offering a refreshing contrast to the savory tuna.
- Cucumber Slices: Crunchy and hydrating, they provide a mild flavor that complements the dish without overwhelming it.
- Edamame: A protein-packed side that is slightly nutty, perfect for adding extra texture and a light flavor pairing.
- Miso Soup: Warm and comforting, this soup gently offsets the heartiness of the rice balls, making for a satisfying meal.
These suggestions will elevate your Easy Tuna Rice Balls into a well-rounded experience that’s both flavorful and fulfilling!
Storage Tips for Easy Tuna Rice Balls
-
Fridge: Store your Easy Tuna Rice Balls in an airtight container in the refrigerator for up to 2 days to maintain freshness and flavor.
-
Freezer: For longer storage, freeze the rice balls for up to 3 months. Place them in a single layer on a baking sheet until firm, then transfer to an airtight container.
-
Thawing: When ready to enjoy, thaw the rice balls in the fridge overnight. Reheat gently in the microwave or pan to restore their texture.
-
Reheating: To reheat, do so in the microwave for about 30 seconds to 1 minute, or until warm. Enjoy them freshly heated for a cozy meal!

Easy Tuna Rice Balls Recipe FAQs
How do I choose ripe ingredients for Easy Tuna Rice Balls?
Absolutely! When selecting your canned tuna, opt for a brand that uses sustainably sourced fish and check for freshness. If you’re using chickpeas, make sure they are well-cooked and tender—about 20-30 minutes if you’re cooking from dried. Always rinse canned chickpeas or beans under cool water to remove any excess sodium before using them!
How should I store Easy Tuna Rice Balls?
You can keep your Easy Tuna Rice Balls in an airtight container in the refrigerator for up to 2 days. To enjoy them at their best, I recommend consuming them fresh, but if you’d like to prepare them ahead, simply wrap them individually in plastic wrap before placing them in the container.
Can I freeze Easy Tuna Rice Balls?
Absolutely! To freeze your Easy Tuna Rice Balls, lay them out on a baking sheet in a single layer and place them in the freezer for about 1 hour until firm. After that, transfer them to an airtight container or freezer bag, where they can last up to 3 months. When you’re ready to enjoy, thaw them in the refrigerator overnight, then gently reheat them to restore their delightful texture.
What if my rice balls fall apart?
If you find your rice balls crumbling or falling apart, it’s often due to the moisture content of the rice. Make sure your rice is fully cooled and not too sticky before shaping. If you’re using less sticky grains like brown rice or quinoa, consider adding a bit more mayonnaise to hold the mixture together. As a last resort, you can mix in a small amount of cooked, cooled mashed potato, which can help bind everything better.
Are there any dietary considerations for Easy Tuna Rice Balls?
Yes, it’s important to consider allergies! If serving these rice balls to friends or family, check for allergies to seafood or gluten. For a gluten-free option, ensure your soy sauce is gluten-free, or use tamari. Also, when making the vegetarian or vegan versions with chickpeas or tofu, always double-check that your mayonnaise is indeed vegan-friendly if necessary!

Easy Tuna Rice Balls That Will Transform Your Lunch Game
Ingredients
Equipment
Method
- In a large bowl, mix together the prepared sushi rice, sesame oil, Japanese mayonnaise, canned tuna (or your choice of substitute), and chopped nori.
- Stir the ingredients gently but thoroughly, ensuring everything is well combined.
- Press the mixture down into an even layer in the bowl, then use a spatula to slice it into 8 triangular portions.
- Take each portion and roll it into a tightly packed ball using your clean hands or gloves.
- Enjoy your rice balls immediately or pack them into containers for on-the-go meals.