
There’s a special kind of joy that comes from creating a dessert that’s both effortlessly chic and downright delicious. When the craving for something sweet strikes and you want to avoid the fuss of baking, my Heavenly No Bake Biscoff Cheesecake is the answer. Picture this: a luscious, creamy filling enriched with the warm, caramel notes of Biscoff cookies, all layered atop a perfectly crunchy base. The best part? You won’t have to turn on the oven or spend hours in the kitchen!
With just a few simple ingredients, this dessert transforms into a stunning showstopper fit for any occasion, from casual family dinners to elegant gatherings. Plus, it’s heaven-sent for those who prefer gluten-free or vegan options. I still find it hard to believe how quickly this indulgent cheesecake comes together, right before your eyes. So, let’s dive into this recipe that promises a taste experience as delightful as the memories it will create!
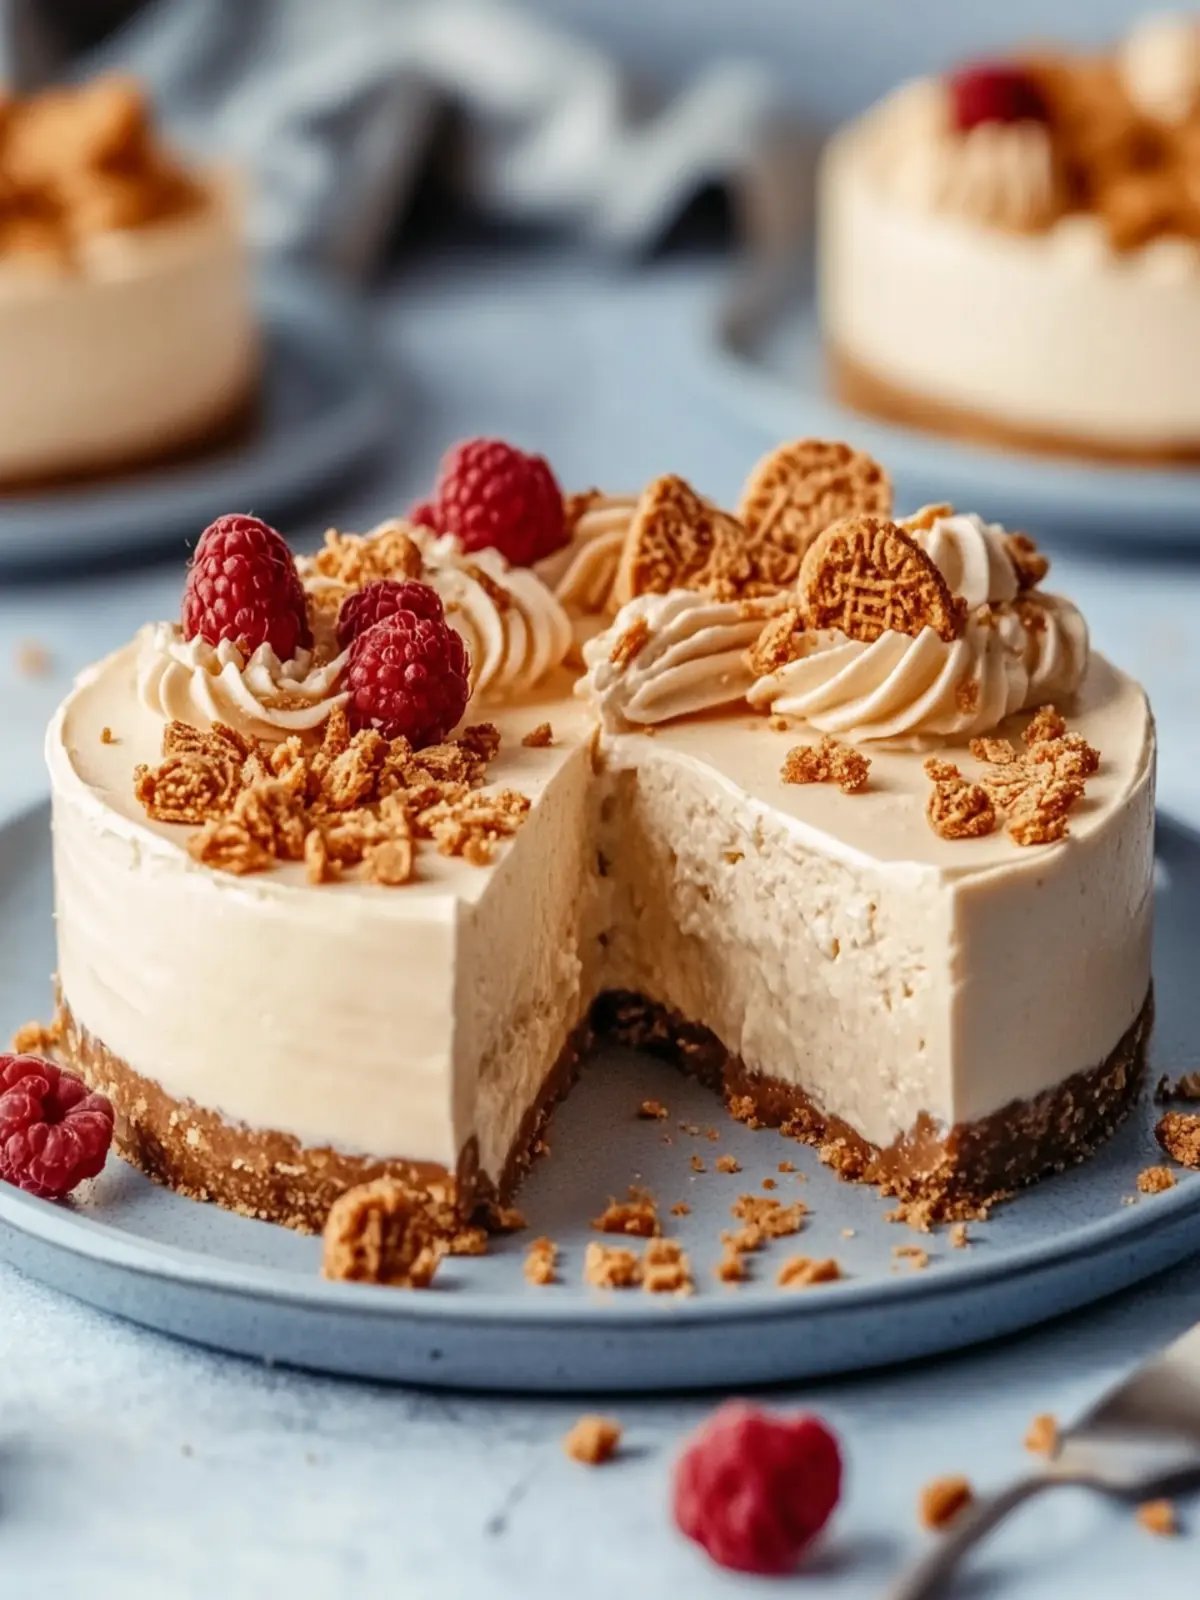
Why is this Heavenly No Bake Biscoff Cheesecake a must-try?
Effortless preparation: This no-bake treat is incredibly easy to whip up, making it perfect for beginners and seasoned cooks alike.
Flavor explosion: The richness of Biscoff cookies creates a unique twist that your taste buds will adore!
Customizable options: Whether you’re gluten-free, vegan, or a chocolate lover, variations keep this dessert exciting!
Showstopper appeal: Impress guests with a stunning dessert that looks as fabulous as it tastes, perfect for any occasion.
Minimal cleanup: With just a few mixing bowls, you can create a delicious masterpiece without a mess.
Get ready to experience a creamy delight that you’ll want to make again and again!
Heavenly No Bake Biscoff Cheesecake Ingredients
Get ready to gather these simple yet delightful ingredients for an unforgettable dessert!
For the Crust
- Biscoff Cookies – Bring a buttery, caramel-like flavor and texture; opt for gluten-free cookies for a gluten-free version.
- Melted Butter – Binds the cookie crumbs for a solid crust; no substitutions needed.
For the Filling
- Cream Cheese – Provides the main structure and creaminess; ensure it’s at room temperature for effortless mixing.
- Sugar – Sweetens the filling; feel free to adjust the quantity for your taste.
- Biscoff Spread – Infuses the cheesecake with its signature flavor; consider using less if you prefer a milder taste.
- Vanilla Extract – Enhances sweetness; using pure extract will elevate the flavor.
- Whipping Cream – Creates a light, airy texture; take care not to over-whip it for the best results.
For the Topping
- Extra Biscoff Spread – Use this for drizzling; warming it slightly helps with even pouring.
- Crushed Biscoff Cookies – Perfect for garnishing; feel free to swap for chocolate shavings or fresh fruit if desired.
Now that you’ve got everything you need, it’s time to elevate your dessert game with this Heavenly No Bake Biscoff Cheesecake!
How to Make Heavenly No Bake Biscoff Cheesecake
-
Prep the Crust: Start by crushing the Biscoff cookies in a ziplock bag until they become fine crumbs. Mix these crumbs with melted butter until the mixture resembles wet sand.
-
Form the Crust: Firmly press the cookie mixture into the bottom of a springform pan, making an even layer. Chill it in the refrigerator for 20 minutes to help it set.
-
Make Filling: In a mixing bowl, beat the cream cheese and sugar together until smooth. Then, gently fold in the Biscoff spread until fully combined for that delicious flavor.
-
Whip Cream: In another bowl, whip the heavy cream until soft peaks form. This will add a delightful airy texture to your cheesecake.
-
Combine: Carefully fold the whipped cream into the Biscoff mixture. Do this gently to keep the filling light and fluffy, ensuring a delightful cheesecake texture.
-
Fill the Crust: Pour the filling over your chilled crust in the springform pan. Spread it evenly with a spatula to achieve a smooth top.
-
Chill to Set: Place the cheesecake in the refrigerator and let it chill for at least 6 hours, or overnight if you can wait, until it’s fully set and firm.
-
Top and Serve: Once chilled, drizzle warmed Biscoff spread on top of the cheesecake. Garnish with crushed Biscoff cookies or your favorite toppings before slicing.
Optional: Serve with fresh berries or a dollop of whipped cream for an extra touch.
Exact quantities are listed in the recipe card below.

Heavenly No Bake Biscoff Cheesecake Variations
Feel free to personalize your cheesecake experience with these delightful twists that spark creativity in the kitchen.
-
Gluten-Free: Substitute Biscoff cookies with gluten-free cookie alternatives for a deliciously inclusive dessert. You won’t lose any flavor here!
-
Vegan Version: Swap in vegan cream cheese, coconut whipped cream, and dairy-free butter for a completely plant-based cheesecake that everyone can enjoy. It’s just as creamy and delightful!
-
Chocolate Infusion: Drizzle melted dark chocolate over the top before serving for an irresistible chocolate kick. The combination of Biscoff and chocolate is simply divine.
-
Spice Addition: Add a pinch of cinnamon or nutmeg to the filling for a warm, aromatic flavor that dances on your palate. It’s like cozying up with a warm hug!
-
Nutty Touch: Incorporate crushed pecans or walnuts into the crust for added texture and an earthy flavor that contrasts beautifully with the creamy filling. This nutty surprise will elevate your cheesecake!
-
Fruit Burst: Top with fresh berries or slices of bananas for a refreshing twist that adds a pop of color and bright flavor. It’s a lovely contrast to the rich Biscoff base.
-
Minty Fresh: Introduce a hint of peppermint extract in the filling for a minty variation that pairs wonderfully with the caramel notes. Your taste buds will thank you!
-
Caramel Drizzle: For an extra indulgent treat, top with a warm caramel sauce that perfectly complements the flavors of the cheesecake. Sweet, gooey goodness awaits!
What to Serve with Heavenly No Bake Biscoff Cheesecake?
Elevate your dessert experience with delightful pairings that complement the rich, creamy flavors beautifully.
-
Fresh Berries: The tartness of strawberries or raspberries cuts through the sweetness and adds a refreshing touch.
-
Whipped Cream: A dollop of lightly sweetened whipped cream enhances the cheesecake’s creaminess while adding an airy texture.
-
Coffee: Rich, brewed coffee perfectly balances the dessert’s sweetness, enhancing those caramel notes in the Biscoff.
-
Chocolate Shavings: For chocolate lovers, miss no chance to elevate the dessert with chocolate shavings, adding an appealing crunch.
-
Mint Leaves: A sprig of fresh mint adds a vibrant pop of color and refreshing aroma, creating a lovely visual and flavor contrast.
-
Vanilla Ice Cream: Creamy vanilla ice cream adds an indulgent touch, making each bite melt blissfully in your mouth.
-
Caramel Sauce: Drizzling extra caramel sauce over the cheesecake accentuates those delicious Biscoff flavors and adds a luscious finish.
-
Sparkling Water: Light, sparkling water cleanses the palate perfectly between bites, ensuring you enjoy every creamy mouthful.
Make Ahead Options
These Heavenly No Bake Biscoff Cheesecake treats are a fantastic choice for meal prep, making your busy weeknights so much smoother. You can prepare the crust and filling up to 24 hours in advance—just follow the initial steps of forming the crust and making the filling, then refrigerate them separately. To maintain the cheesecake’s creamy texture and flavor, cover the crust with plastic wrap and the filling in an airtight container to avoid absorbing any fridge odors. When you’re ready to serve, simply spread the filling over the chilled crust and let it set for an additional 30 minutes before garnishing and enjoying. This way, you’ll impress guests with minimal effort and maximum taste!
Expert Tips for Heavenly No Bake Biscoff Cheesecake
-
Chill Patiently: Proper chilling for at least 6 hours is crucial to ensure your cheesecake sets beautifully without becoming runny.
-
Use Room Temperature Ingredients: Let cream cheese come to room temperature for smooth mixing and a creamier texture in your heavenly no bake Biscoff cheesecake.
-
Gentle Folding: Be gentle when folding the whipped cream into the filling to maintain that light and airy texture that makes this dessert so special.
-
Quality Counts: Opt for high-quality Biscoff products and cream cheese for a more flavorful and indulgent cheesecake experience.
-
Watch the Whipping: Keep an eye on your whipped cream; over-whipping can lead to a dense filling that loses that coveted lightness.
Storage Tips for Heavenly No Bake Biscoff Cheesecake
Fridge: Store the cheesecake in an airtight container for up to 3 days. This preserves its creamy texture and rich flavors, keeping it delicious for your cravings!
Freezer: Slice and wrap each piece individually in plastic wrap, then place them in a freezer-safe container. Your cheesecake can last for up to 2 months, ready for an easy dessert later.
Thawing: To enjoy frozen slices, transfer them to the fridge overnight to thaw slowly. This helps maintain the ultimate creaminess of your Heavenly No Bake Biscoff Cheesecake.
Serving: After thawing, top with additional drizzles of Biscoff spread or fresh garnishes to restore that beautiful presentation before serving.

Heavenly No Bake Biscoff Cheesecake Recipe FAQs
What type of Biscoff cookies should I use?
You should use classic Biscoff cookies for the best flavor, but gluten-free versions are available as well. Look for cookies without dark spots or cracks to ensure freshness.
How should I store my leftover cheesecake?
Store your Heavenly No Bake Biscoff Cheesecake in an airtight container in the fridge for up to 3 days. This will keep it tasting fresh and creamy. It’s best to serve it chilled for the ultimate indulgence!
Can I freeze the cheesecake, and how do I do it?
Absolutely! To freeze your cheesecake, slice it into individual pieces, wrap each slice tightly in plastic wrap, and place them in a freezer-safe container. It can be stored for up to 2 months. When you’re ready to enjoy, transfer the slices to the fridge overnight to thaw slowly for the best texture.
What should I do if my whipped cream is over-whipped?
If your whipped cream has turned grainy or it’s too thick, no worries! You can gently fold in a small amount of cold heavy cream to lighten it back up. This will help restore some of that airy texture in your filling!
Is this cheesecake suitable for pets or people with allergies?
While this cheesecake is a delightful treat for people, it’s essential to keep it away from pets, especially dogs, as sugar and cream can upset their stomachs. For allergies, ensure that guests are aware of the wheat, dairy, and sugar content, or consider using alternatives like vegan cream cheese and dairy-free whipped creams!

Heavenly No Bake Biscoff Cheesecake That Will Wow Your Guests
Ingredients
Equipment
Method
- Crush Biscoff cookies in a ziplock bag until fine crumbs, then mix with melted butter until it resembles wet sand.
- Firmly press the cookie mixture into the bottom of a springform pan to form an even layer, then chill in the refrigerator for 20 minutes.
- In a mixing bowl, beat the cream cheese and sugar together until smooth, then gently fold in Biscoff spread.
- Whip the heavy cream in another bowl until soft peaks form, then gently fold into the Biscoff mixture.
- Pour the filling over the chilled crust in the springform pan and spread it evenly.
- Chill the cheesecake in the refrigerator for at least 6 hours or overnight until fully set.
- Drizzle warmed Biscoff spread on top and garnish with crushed Biscoff cookies before slicing.