
When the craving for fresh, warm bread strikes, but time is short, I whip up this delightful No-Oven Turkish Bread with just three ingredients—Bazlama. It’s remarkable how something so simple can achieve such a soft, pillowy texture, perfect for scooping up velvety dips or wrapping around savory fillings. Picture this: the dough lightly frying in a pan, puffing up beautifully, filling your kitchen with an enticing aroma that beckons everyone to the table.
This recipe isn’t just for seasoned chefs; it’s designed for anyone looking to elevate their meals without the fuss of a traditional oven. Whether you’re busy with family dinners or prepping for a cozy night in, this flatbread makes an excellent canvas for creativity. Serve it warm as an irresistible starter, or use it to accompany your favorite home-cooked curries and stews. Trust me, once you try this easy and satisfying recipe, you’ll want to add it to your weekly meal rotation!

Why Choose No-Oven Turkish Bread Today?
Simplicity at its finest: With just three ingredients, you’ll find this recipe incredibly easy to whip up in no time.
Pillowy texture: The Bazlama bread puffs beautifully while cooking, creating a soft and tender bite perfect for dipping.
Versatile companion: Enjoy it with flavorful dips like hummus or wrap it around savory meats—truly a crowd-pleaser!
Quick cooking method: No need for an oven; just a frying pan works wonders, saving you time and cleanup effort.
Family-friendly: Great for families, this recipe encourages creativity—you can add herbs or spices to customize it to your liking!
No-Oven Turkish Bread Ingredients
For the Dough
• All-Purpose Flour – This creates a tender base; you can substitute with whole wheat flour for a heartier flavor.
• Warm Water – Necessary for hydrating the dough and helping it rise; feel free to use warm milk for added richness.
• Instant Dry Yeast – Essential for achieving that delightful puff; you can use active dry yeast, but remember to proof it first.
For Cooking
• Olive Oil (for frying) – This adds flavor and prevents sticking; feel free to use any neutral oil if desired.
• Salt – Enhances the flavor of the dough; adjust to taste based on dietary needs.
This No-Oven Turkish bread is effortless and a great addition to your cooking repertoire!
How to Make No-Oven Turkish Bread
-
Mix Ingredients: In a mixing bowl, combine warm water, instant dry yeast, and salt. Stir gently until dissolved. Let it sit for about 5 minutes, allowing the yeast to activate.
-
Add Flour: Gradually add all-purpose flour to the mixture. Stir until it forms a soft dough, then knead by hand for about 5 minutes until smooth and elastic.
-
Rest the Dough: Cover the dough with a clean kitchen towel and let it rise in a warm area for about 30-40 minutes, or until it doubles in size.
-
Shape the Bread: Once risen, divide the dough into 6 portions. Roll each piece into a ball, then flatten each ball into a round disc, about ½ inch thick.
-
Heat and Cook: Heat a frying pan over medium heat and add a bit of olive oil. Cook each piece of flattened dough for 2-3 minutes on one side, or until golden brown. Flip and cook on the other side until puffed and lightly browned.
-
Serve Warm: Remove from the pan and let cool slightly. Serve warm for the best texture, alongside your favorite dips or as a wrap!
Optional: Drizzle with olive oil and sprinkle with herbs for added flavor!
Exact quantities are listed in the recipe card below.

Expert Tips for No-Oven Turkish Bread
-
Activate the Yeast: Make sure the warm water isn’t too hot; overly high temperatures can kill the yeast, resulting in flat bread.
-
Knead Efficiently: Aim for a smooth and elastic dough during kneading—this ensures your No-Oven Turkish Bread puffs up nicely while cooking.
-
Rest Time Matters: Don’t skip the resting time; allowing the dough to rise is crucial for achieving that soft, pillowy texture essential in Turkish flatbread.
-
Watch the Heat: Maintain medium heat while cooking to prevent burning; if it’s too hot, the bread won’t cook through or puff properly.
-
Experiment with Flavors: Feel free to add spices like garlic or herbs to the dough for a delicious twist; just remember to balance flavors so that the bread shines through!
No-Oven Turkish Bread Variations
Unlock the potential of your No-Oven Turkish Bread with these delightful twists that bring extra flavor and creativity to the table.
-
Herbed Delight:
Mix in freshly chopped herbs like dill or cilantro into the dough. This simple addition introduces a fragrant harmony that elevates every bite. -
Cheesy Indulgence:
Add grated cheese like mozzarella or feta into the dough for a gooey surprise. The melted cheese will create delightful pockets in the flatbread, making it even more irresistible! -
Spicy Kick:
Incorporate a pinch of red pepper flakes or cayenne pepper into the dough for a zesty kick. This spicy variation pairs beautifully with cooling dips, creating an exciting flavor contrast. -
Sweet Twist:
For a sweet version, blend in a tablespoon of honey or maple syrup and a sprinkle of cinnamon. Perfect for enjoying with sweet spreads or fruit. -
Whole Grain Goodness:
Substitute half of the all-purpose flour with whole wheat flour for a nuttier flavor and added fiber. This not only enhances health benefits but also gives the bread a satisfying texture. -
Nutty Surprise:
Fold in some chopped nuts, like walnuts or pistachios, into the dough for extra crunch and flavor. The little bursts of nutty goodness create a whole new experience with each bite. -
Seeded Crunch:
Sprinkle sesame seeds or poppy seeds on top of the bread before cooking for an added crunch and visual appeal. These seeds bring a nutty flavor that complements the soft bread. -
Garlic Infusion:
Sauté minced garlic in olive oil and brush it on the dough before cooking. This guarantees a tantalizing aroma and a savory bite that dances on your palate.
Let your kitchen transform into a playground of flavors, and create a No-Oven Turkish Bread that’s uniquely yours!
What to Serve with No-Oven Turkish Bread?
Imagine a delightful spread where warm, pillowy flatbread takes center stage, inviting indulgence and creativity.
-
Hummus: This creamy dip offers the perfect balance of flavors, making every bite of bread a savory experience.
-
Tender Grilled Chicken: Juicy strips of marinated chicken offer protein-packed perfection for wrapping and savoring with a splash of tangy sauce.
-
Flavorful Lentil Curry: The rich spices in lentil curry harmonize beautifully with the softness of the bread, creating a comforting meal.
-
Fresh Tomato Salad: Bright, juicy tomatoes tossed with herbs add a refreshing crunch, elevating your flatbread dining experience.
-
Spinach and Feta Stuffed Peppers: These savory stuffed peppers pair well as a hearty filling, creating a delightful wrapping option for your Turkish bread.
-
Mint Yogurt Sauce: A cooling and zesty yogurt dip complements the warmth of the bread, creating an irresistible duo.
-
Crispy Falafel: Deep-fried to golden perfection, these bites provide a delightful crunch and flavor contrast to the fluffy bread.
-
Spiced Chickpeas: Roasted chickpeas seasoned with aromatic spices make a delicious topping, adding more texture and heartiness to each bite.
-
Sweet Honey Drizzle: For a touch of dessert, a drizzle of honey transforms your Turkish bread into a delightful sweet treat you never knew you needed!
Storage Tips for No-Oven Turkish Bread
Room Temperature: Store the bread in a paper bag or wrapped in a clean kitchen towel for up to 3 days to maintain its softness.
Fridge: While not necessary, you can refrigerate the bread in an airtight container for up to 5 days. Just reheat before serving to restore freshness.
Freezer: For longer storage, freeze the bread in a single layer, then transfer to a freezer bag for up to 3 months. Thaw overnight in the refrigerator and reheat in a pan before serving.
Reheating: Gently reheat the No-Oven Turkish Bread in a hot pan for a minute on each side or use a microwave for about 20-30 seconds for that perfect softness.
Make Ahead Options
These No-Oven Turkish Bread pieces are perfect for meal prep, saving you time on busy weeknights! You can prepare the dough up to 24 hours in advance by mixing all ingredients, allowing it to rise, and then shaping it into discs. Store the shaped flatbreads layered with parchment paper in an airtight container in the refrigerator. When you’re ready to serve, simply heat a pan and cook them for about 2-3 minutes on each side until puffed and lovely. This method ensures you’ll have fresh, soft Turkish bread ready to complement any meal, just as delicious as if made on the same day!

No-Oven Turkish Bread Recipe FAQs
What type of flour is best for No-Oven Turkish Bread?
I recommend using all-purpose flour for a tender texture, but you can also opt for whole wheat flour for a nutty flavor and denser bite.
How should I store leftover No-Oven Turkish Bread?
You can store it at room temperature in a paper bag for up to 3 days to keep its softness. If you prefer, wrap it in a clean kitchen towel, which helps maintain moisture.
Can I freeze No-Oven Turkish Bread?
Absolutely! To freeze, let the bread cool completely, then place it in a single layer on a baking tray for about an hour. Once frozen, transfer the pieces to a freezer bag, where they can last for up to 3 months. To reheat, thaw in the refrigerator overnight and warm it in a pan for a minute on each side.
Why is my No-Oven Turkish Bread not puffing up?
This can happen for a few reasons. First, ensure your yeast is fresh and active—using warm water that’s too hot can kill it. Also, maintain medium heat while cooking; if the heat is too low, the bread won’t puff up properly.
Can I add herbs or spices to my No-Oven Turkish Bread?
Yes, very! Mixing in herbs or spices like garlic powder or rosemary into the dough can add delightful flavors. Just remember to keep the quantities balanced so they enhance, not overpower, the bread itself.
Is No-Oven Turkish Bread suitable for dietary restrictions?
Absolutely! You can make it dairy-free by substituting warm water or milk with plant-based options like almond milk. Adjust salt levels according to dietary needs, and feel free to experiment with gluten-free flour for those with gluten sensitivities.
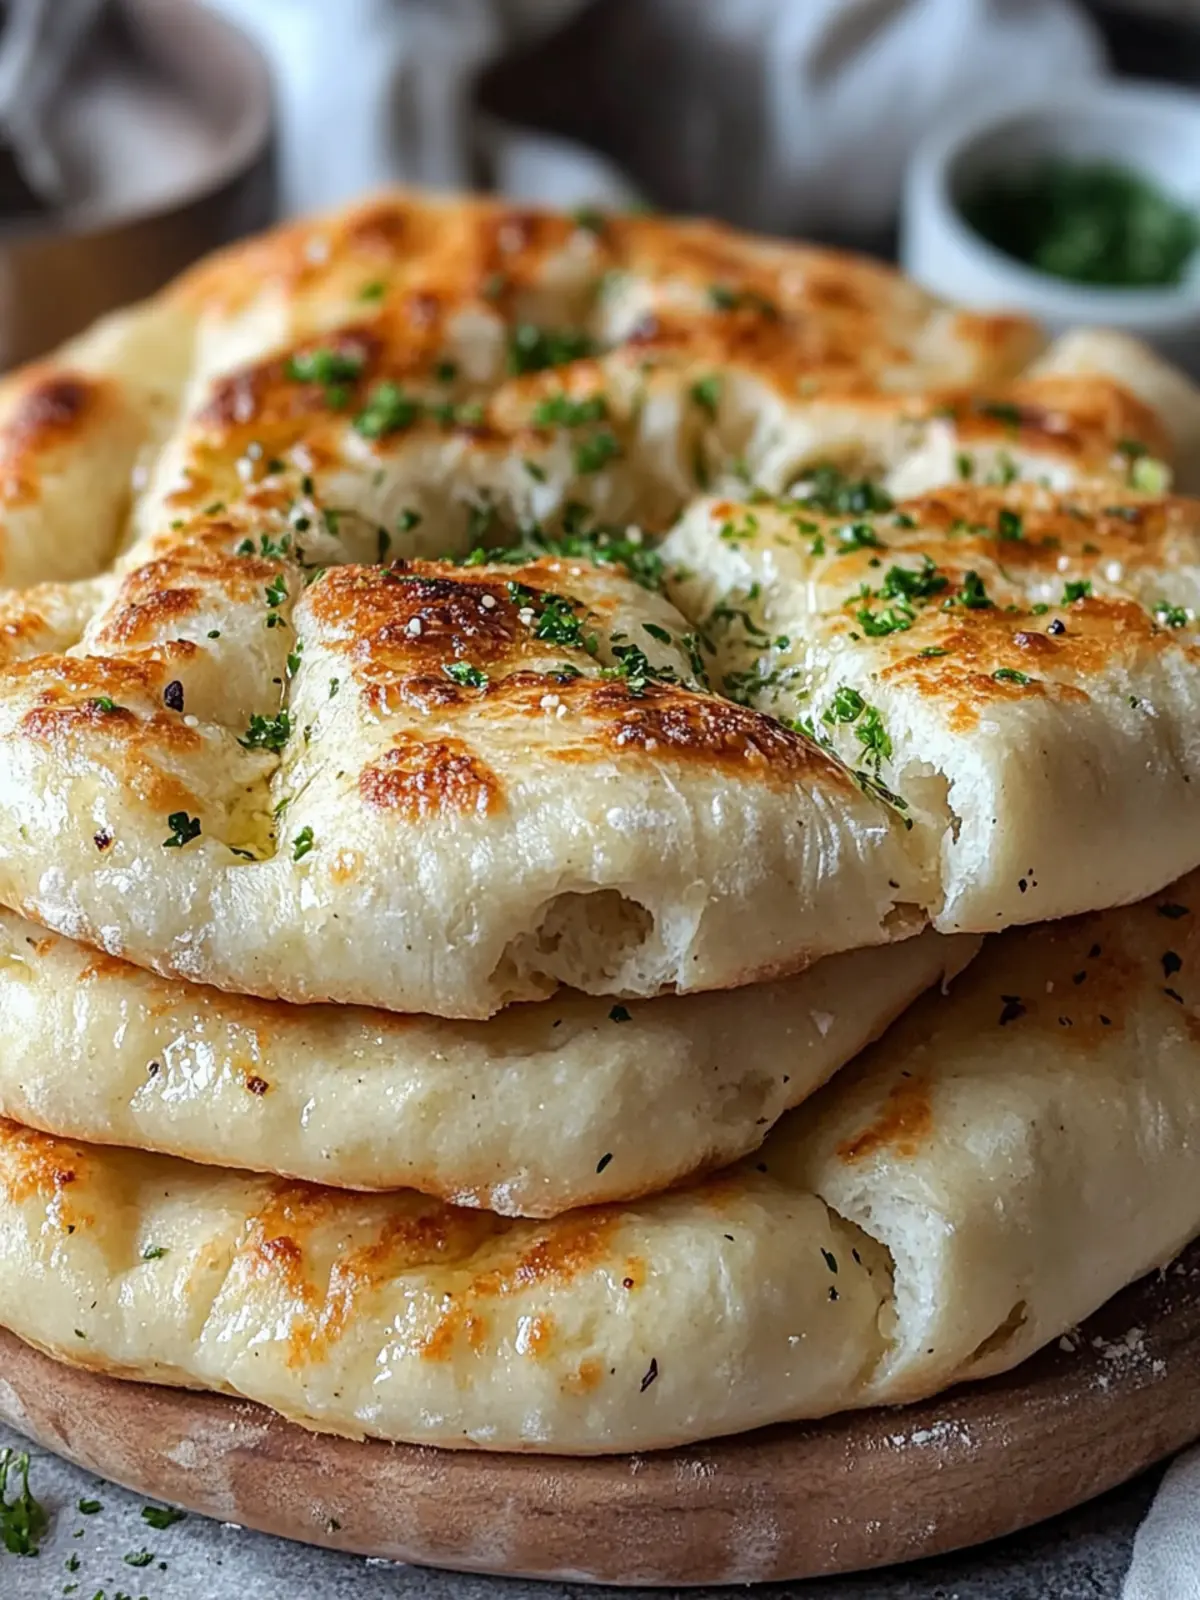
No-Oven Turkish Bread With Only 3 Ingredients Bazlama Bliss
Ingredients
Equipment
Method
- In a mixing bowl, combine warm water, instant dry yeast, and salt. Stir gently until dissolved. Let it sit for about 5 minutes, allowing the yeast to activate.
- Gradually add all-purpose flour to the mixture. Stir until it forms a soft dough, then knead by hand for about 5 minutes until smooth and elastic.
- Cover the dough with a clean kitchen towel and let it rise in a warm area for about 30-40 minutes, or until it doubles in size.
- Once risen, divide the dough into 6 portions. Roll each piece into a ball, then flatten each ball into a round disc, about ½ inch thick.
- Heat a frying pan over medium heat and add a bit of olive oil. Cook each piece of flattened dough for 2-3 minutes on one side, or until golden brown. Flip and cook on the other side until puffed and lightly browned.
- Remove from the pan and let cool slightly. Serve warm for the best texture, alongside your favorite dips or as a wrap!