
There’s something truly special about bringing a classic dessert to life in your own kitchen. As the aroma of this creamy vanilla bean cheesecake wafts through the air, memories of lavish family gatherings and cheerful celebrations come rushing back. You might think that a showstopper like this requires a professional touch, but I promise, it’s surprisingly simple.
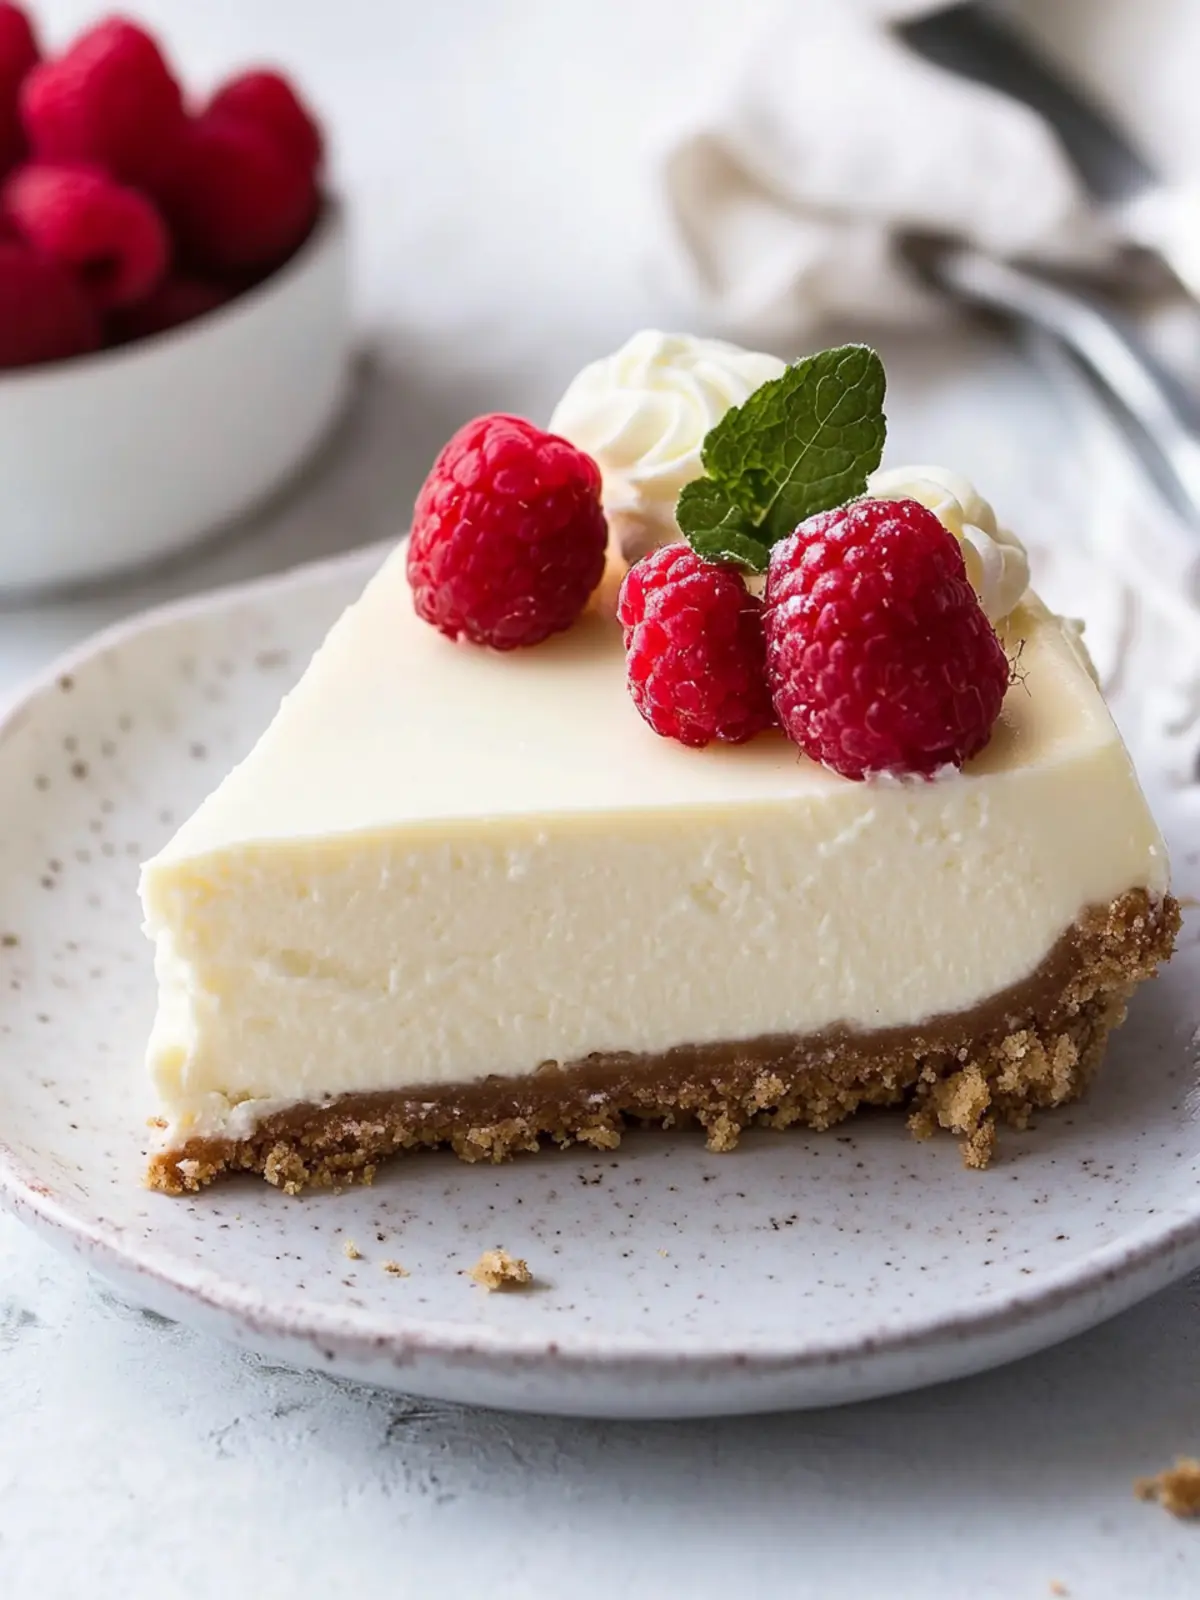
Crafted with velvety cream cheese and the exquisite flavor of real vanilla beans, this no-bake cheesecake is bound to impress even the most discerning sweet tooth. It’s the kind of dessert that turns an ordinary meal into an extraordinary feast, making it perfect for potlucks, birthdays, or just a cozy night in. So, if you’re ready to say goodbye to bland fast food desserts and treat your palate to something delightful, grab your apron, and let’s get started on this luscious vanilla bean cheesecake!

Why is Vanilla Bean Cheesecake the best?
Decadent Creaminess: This no-bake Vanilla Bean Cheesecake boasts an incredibly smooth texture, like a cloud of rich creaminess melting in your mouth.
Simple Preparation: No baking means you can whip this together quickly, making it perfect for unexpected guests or last-minute celebrations.
Anyone Can Make It: Even if you’re not a seasoned chef, this recipe is straightforward enough to impress while keeping the process enjoyable.
Flavor Explosion: With the delightful essence of real vanilla beans, each slice delivers an unforgettable flavor experience that outshines store-bought options.
Versatile Toppings: Play with toppings like fresh fruit, chocolate ganache, or a hint of caramel for a personal touch that suits any occasion.
Crowd-Pleasing Delight: This cheesecake serves 16-18 people, making it an ideal centerpiece for gatherings, sure to win over everyone at the table.
Vanilla Bean Cheesecake Ingredients
For the Crust
• Graham Cracker Crumbs – Provides the crust’s base; you can use whole graham crackers ground into crumbs for a fresher taste.
• Ground Cinnamon – Enhances flavor in the crust; feel free to omit for a simpler flavor profile.
• Butter – Binds the crust ingredients together; use unsalted butter for better control over saltiness.
For the Filling
• Cream Cheese – Main filling component providing rich creaminess; ensure it’s softened for easy mixing at room temperature.
• Granulated Sugar – Sweetens the filling; adjust according to your taste preference for the best vanilla bean cheesecake experience.
• Vanilla Bean – Provides natural vanilla flavor; if you don’t have one, vanilla extract makes a great substitute.
• Heavy Whipping Cream – Adds richness and stability to the filling; it must be cold for proper whipping.
• Flour – Helps stabilize the cheesecake’s texture; use all-purpose flour for the best results.
• Eggs – Provide structure and richness to the filling; make sure they are at room temperature for better incorporation.
Optional Toppings
• Fresh Fruit – Enhances flavor and adds natural sweetness; berries work great for a refreshing touch.
• Chocolate Ganache – Drizzle over the cheesecake for a decadent twist; perfect for chocolate lovers!
• Caramel Sauce – Adds a sweet contrast to the creamy filling; this is a delightful option if you want to elevate your presentation.
With these ingredients, your homemade Vanilla Bean Cheesecake will create a memorable dessert that could become the highlight of any gathering!
How to Make Vanilla Bean Cheesecake
-
Preheat Oven: Begin by setting your oven to 350°F (175°C). Make sure to prepare a 9” springform pan with a light coat of non-stick spray to prevent sticking.
-
Prepare Crust: Pulse the graham crackers in a food processor until they turn into fine crumbs. Combine these crumbs with melted butter and ground cinnamon, then press the mixture firmly into the bottom of your prepared springform pan. Bake for 10 minutes, then let it cool.
-
Prepare Filling: Beat the softened cream cheese in a mixer until it’s perfectly smooth. Add in the granulated sugar and flour, continuing to mix until everything is well combined and creamy.
-
Mix in Vanilla: Scrape the seeds from the vanilla bean into the mixture and fold in the heavy cream. Then, add each egg one at a time, ensuring they are fully incorporated after each addition to keep the texture smooth.
-
Assemble Cheesecake: Pour half of the cheesecake batter onto the cooled crust. If desired, swirl in some raspberry sauce for an extra pop of flavor. Layer the rest of the batter on top and if there’s any remaining sauce, feel free to repeat the swirling.
-
Bake: Bake the cheesecake for 15 minutes at 350°F. After that, reduce the oven temperature to 200°F (93°C) without opening the oven door, and let it bake for an additional 50 minutes until set.
-
Cool and Set: Turn off the oven and crack the door open, allowing the cheesecake to cool for about 20-30 minutes. After that, move it to room temperature, and then refrigerate for at least 6 hours, or overnight, to let it fully set.
Optional: Top with whipped cream and fresh fruit slices for a beautiful presentation.
Exact quantities are listed in the recipe card below.

What to Serve with Vanilla Bean Cheesecake?
Create the perfect dining experience with these delightful pairings that will elevate your cheesecake to star status.
-
Fresh Berries: The tartness of strawberries and raspberries complements the creamy sweetness, adding a vibrant splash of color to your dessert table.
-
Chocolate Ganache: A rich, silky chocolate drizzle will contrast beautifully with the vanilla flavors, pleasing those with a penchant for chocolatey indulgence.
-
Whipped Cream: Light and fluffy, whipped cream enhances the cheesecake’s texture while providing a lovely decoration. It’s the classic finishing touch that everyone loves.
-
Caramel Sauce: A drizzle of warm caramel adds a luxurious touch, creating a sweet balance that enhances every bite of the cheesecake.
-
Ice Cream: A scoop of vanilla or caramel ice cream provides an irresistible creamy contrast and a delightful temperature variation when enjoyed alongside the cheesecake.
-
Tea or Coffee: A warm cup of coffee or herbal tea can beautifully cleanse the palate between bites, while the aromatic flavors mingle with the dessert.
-
Fruit Tart: Serve alongside a fresh fruit tart for a colorful contrast that introduces a variety of textures and flavors to your dessert experience.
With these pairings, your Vanilla Bean Cheesecake will shine as the centerpiece of a truly memorable meal.
How to Store and Freeze Vanilla Bean Cheesecake
Fridge: Store the cheesecake in an airtight container in the refrigerator for up to 1 week, preserving its creamy texture and rich flavor.
Freezer: For longer storage, freeze the cheesecake for up to 2 months. Wrap it tightly in plastic wrap and then in aluminum foil to prevent freezer burn.
Individual Slices: If you’ve made extra, slice and wrap individual portions in plastic wrap. This allows for quick thawing and easy access to enjoy your delicious vanilla bean cheesecake anytime!
Reheating: Thaw frozen slices in the refrigerator overnight before serving to restore the perfect texture.
Make Ahead Options
These Vanilla Bean Cheesecakes are a fantastic make-ahead option for busy cooks! You can prepare the crust and filling up to 24 hours in advance by refrigerating them separately after their initial preparation. For the best results, bake the cheesecake and let it cool in the oven as instructed, then refrigerate overnight to allow the flavors to meld beautifully. When you’re ready to serve, simply let it sit at room temperature for about 30 minutes before slicing to achieve that perfect creamy texture. This way, you’ll enjoy an impressive dessert with minimal effort on the day of your gathering!
Expert Tips for Vanilla Bean Cheesecake
-
Room Temperature Ingredients: Ensure all ingredients, especially cream cheese and eggs, are at room temperature. This helps achieve a smooth and creamy filling without lumps.
-
Avoid Overmixing: Once you add the eggs, mix just until combined. Overbeating can incorporate too much air, leading to cracks in your vanilla bean cheesecake.
-
Cool Gradually: To prevent cracking, allow the cheesecake to cool down slowly in the oven after baking. A sudden temperature change can cause it to crack.
-
Chill Overnight: For the best flavor and texture, refrigerate your cheesecake overnight. This allows the filling to fully set and flavors to deepen.
-
Perfect Portions: Use a clean knife to slice for neat pieces. Wipe the knife with a damp cloth between cuts to keep edges tidy.
-
Customize Toppings: Feel free to experiment! Fresh fruits or chocolate ganache can elevate your vanilla bean cheesecake and impress your guests.
Vanilla Bean Cheesecake Variations
Feel free to add your personal twist to this delightful cheesecake and make it uniquely yours!
-
Dairy-Free: Substitute cream cheese with a non-dairy alternative and use coconut cream instead of heavy cream for a lighter option.
Be adventurous—both options will still yield a rich and creamy texture! -
Gluten-Free: Use gluten-free graham crackers or almond flour to create a crust that everyone can enjoy.
This simple swap ensures everyone can indulge without worry, becoming a hit at gatherings! -
Fruit-Infused: Fold in pureed fruits like strawberries or blueberries into the filling for a fruity twist.
The vibrant colors and flavors will brighten up every slice, offering a delightful surprise! -
Chocolate Lovers: Mix cocoa powder or melted chocolate into the filling for a chocolate vanilla bean cheesecake.
Imagine the chocolatey goodness mingling with the vanilla—it’s a dessert dream come true! -
Nutty Crunch: Add chopped nuts such as walnuts or pecans to the crust for an added crunch.
This twist provides a lovely contrast to the creamy filling and elevates the overall texture! -
Maple Sweetener: Swap granulated sugar for maple syrup to create a subtly sweet and rich cheesecake.
The hint of maple will impress those around the table and add a unique flavor note! -
Boozy Indulgence: Incorporate a splash of your favorite liqueur, like amaretto or Bailey’s, into the filling.
The warmth of the booze adds a sophisticated layer, perfect for adult gatherings! -
Zesty Lemon: Stir in some lemon juice or zest into the filling for a refreshing citrus kick.
This bright flavor will lighten up the richness, making each bite an uplifting experience!
Vanilla Bean Cheesecake Recipe FAQs
How do I choose the right vanilla bean?
Absolutely! When selecting a vanilla bean, look for ones that are plump and moist. The skin should have a glossy finish, and they should bend without breaking. Avoid beans that are dry or have dark spots, as those can indicate older or lower-quality beans. If fresh vanilla beans are hard to find, high-quality vanilla extract can be an excellent substitute.
How can I store leftover cheesecake?
Very! To store your vanilla bean cheesecake, simply place it in an airtight container in the refrigerator where it will stay fresh for up to 1 week. If you prefer, you can cover the cheesecake directly with plastic wrap if there’s no container available. This way, it’ll maintain its creamy texture without drying out.
Can I freeze my vanilla bean cheesecake?
Absolutely! To freeze your cheesecake, slice it first if you’d like individual portions, then wrap each slice tightly in plastic wrap and aluminum foil. This will help prevent freezer burn. You can store it in the freezer for up to 2 months. When you’re ready to enjoy, thaw the slices in the refrigerator overnight for the best texture.
What should I do if my cheesecake cracks during baking?
Don’t worry; it happens to the best of us! To avoid cracking, ensure you let the cheesecake cool gradually in the oven after baking. Sudden temperature changes can cause it to crack as it cools. Also, avoid overmixing after adding eggs, as this incorporate too much air, which can lead to cracks. If it does crack, consider topping it with whipped cream or a fruit sauce to hide imperfections!
Can I make this cheesecake gluten-free?
Of course! To make your vanilla bean cheesecake gluten-free, simply substitute the graham cracker crumbs with gluten-free graham cracker alternatives or even crushed nuts. Just ensure that any other ingredients you use are also certified gluten-free, like the flour and baking ingredients!
Can I give cheesecake to my pets?
It’s best to avoid sharing cheesecake with pets. Ingredients like sugar, cream, and particularly chocolate (if used in a variation) can be harmful to them. If you want a sweet treat for your furry friends, consider making special pet-friendly treats instead!

Irresistible Vanilla Bean Cheesecake That's No Bake Magic
Ingredients
Equipment
Method
- Preheat oven to 350°F (175°C) and prepare a 9” springform pan with non-stick spray.
- Pulse graham crackers in a food processor until fine crumbs form.
- Combine crumbs with melted butter and ground cinnamon, and press firmly into the bottom of the pan.
- Bake crust for 10 minutes, then let it cool.
- Beat softened cream cheese in a mixer until smooth.
- Add granulated sugar and flour, and mix until creamy.
- Scrape seeds from vanilla bean into mixture and fold in heavy cream.
- Add eggs one at a time, mixing until fully incorporated.
- Pour half of the cheesecake batter onto the cooled crust.
- Layer the rest of the batter on top and swirl in any raspberry sauce if desired.
- Bake the cheesecake for 15 minutes, then reduce oven temperature to 200°F (93°C) and bake for an additional 50 minutes.
- Turn off the oven, crack the door open, and let cheesecake cool for 20-30 minutes.
- Move to room temperature, then refrigerate for at least 6 hours or overnight.